Say "hello" to a more convenient and secure login!
With Windows Hello PIN, a short, self-selected PIN is all you need to unlock your Windows device. This modern login method is not only convenient (you don't need another device for authentication), but also extremely secure.
Your PIN is stored in encrypted form on a (TPM) chip built into the laptop and is therefore bound to your device. In other words, even if hackers were able to intercept your PIN, they would still need to have physical access to your device in order to use it.
Windows Hello PIN setup
Prerequisites:
Windows 10 or higher operating system
Initially an authenticator app, such as Microsoft Authenticator or a similar app on your smartphone and/or tablet
An FH Microsoft account
Instruction: Set up Windows Hello PIN
-
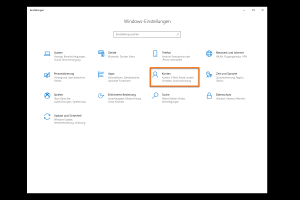
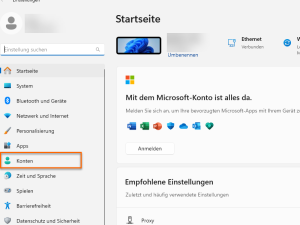
Open Windows settings
Open the "Settings" (Windows key +I).
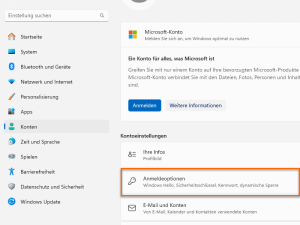
Click on the "Accounts" category in the menu.
-
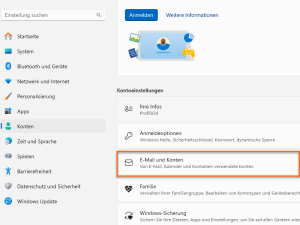
Store Microsoft account 1
To set up Windows Hello PIN, you must now link your device to your UAS Microsoft account. In some cases, this step can be skipped, for example, devices managed by the university IT department are often linked automatically.
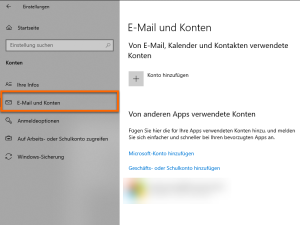
Select "Email and accounts" from the menu.
-
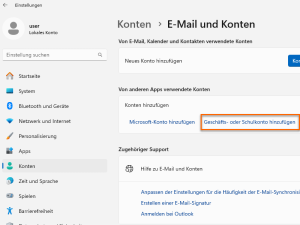
Deposit Microsoft account 2
If you already see an account here that ends with your business or university email address (e.g. @fh-dortmund.de or @stud.fh-dortmund.de), you do not need to do anything else and can proceed directly to the next step of the instructions.
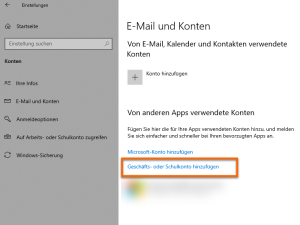
Otherwise, add your FH account as follows:
Under the "Accounts used by other apps" section, select the "Add business or school account" option.
Follow the on-screen instructions to enter your Microsoft account credentials.
-
Call up login options
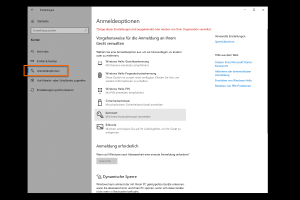
Now select "Login options" from the menu on the left.
-
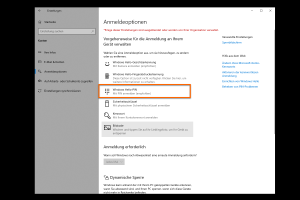
Add Windows Hello PIN
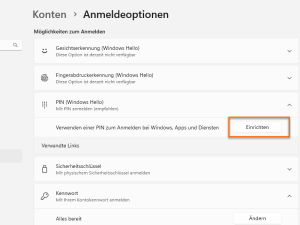
You will find the various Windows Hello options under the Login options section.
Select the "Windows Hello PIN" option and click on "Add".
-
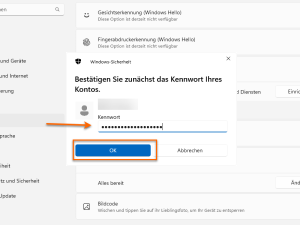
Enter Microsoft account password
You will be asked to enter your FH-Microsoft password and confirm this with "OK".
-
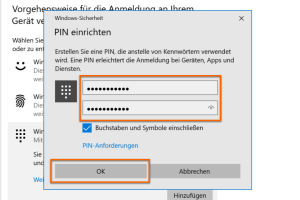
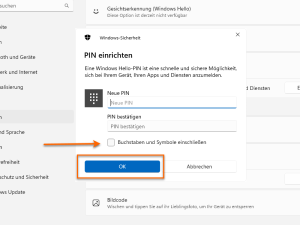
Create desired PIN
Now enter at least one six-digit PIN and confirm this with "OK".
Important: Remember this PIN well! In future, you will be asked for it instead of your FH password when you log in to your device and online services.
Tip: In addition to numbers, the PIN can also consist of letters and special characters, provided you have selected the "Include letters and symbols" checkbox.
-
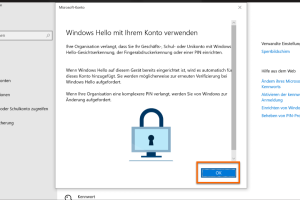
Link Windows Hello PIN with business account
Click on OK.
-
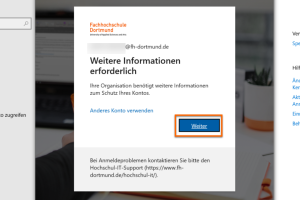
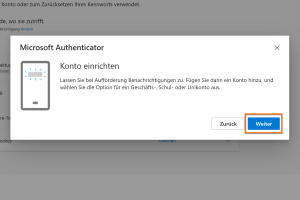
Further information required
Your organisation requires further information to protect your account.
Click on "Next".
-
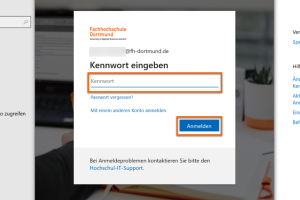
Enter password
Enter your Microsoft password (not PIN!) and confirm the action with "Log in".
-
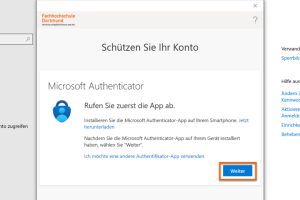
Authenticator App installieren
You will then be asked to install an authenticator app on your smartphone/tablet. The Microsoft Authenticator App is recommended for seamless integration.
After successfully installing the app, click "Next".
The following steps relate to setting up the Microsoft Authenticator app.
Note: You can also use another authenticator app of your choice, such as Google Authenticator. In this case, select the option "I want to use a different authenticator app".
-
First steps in the Authenticator app
Open the MS Authenticator app on your smartphone or tablet.
When you first start the app, you will be guided through some basic settings:
Privacy policy: Confirm the privacy policy with "Accept". If you do not agree, you will not be able to use the app.
Usage data: Simply leave this setting deactivated (already preset) and select "Next" to continue.
"Protect your digital life": Click "Skip".
.
-
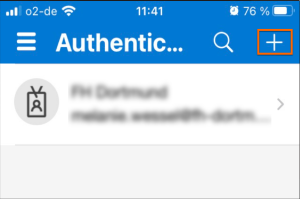
Add Microsoft account
To add your Microsoft account in the app, click on the "plus symbol +" (top right in the menu) and select "Business or school account" as the account type.
-
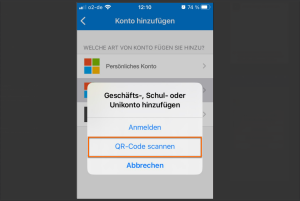
Allow device camera
Then click on the option "QR code scan".
Allow access to your device camera with "OK" or "Allow". The camera in your device is now activated.
-
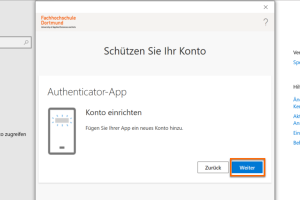
Finalise account setup
Return to your Internet browser and click "Next" in the "Protect your account - Set up account" step.
Have your smartphone/tablet ready.
-
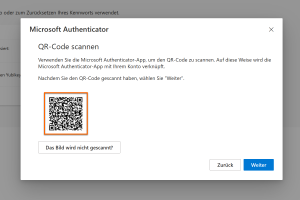
QR code scanning
Scan the QR code now displayed with your Authenticator app on your computer screen.
Your camera app should automatically recognise and read the code.
-
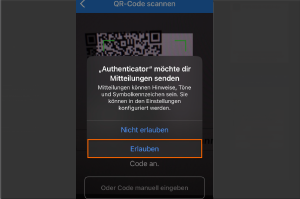
Allow notifications
After you have scanned the QR code, a request to authorise messages will appear on your smartphone or tablet. Please confirm this with "OK" or "Allow".
Your FH-Microsoft account is now successfully stored in the app.
Note: If you are already using the Authenticator app, check your app settings if necessary.
-
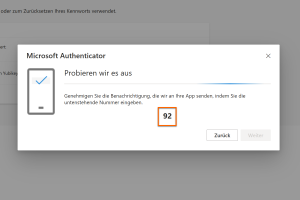
Test push notifications
You will now see any two-digit number on your computer screen.
At the same time, you will receive a message on your smartphone or tablet. Enter the number you see on your computer in the app on your smartphone or tablet and confirm with "Yes".
-
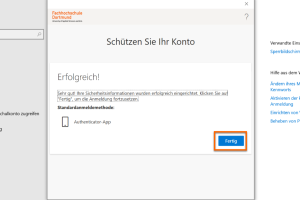
Installation completed!
Click on "Done" to successfully complete the registration!
You can now log in to your device with your Windows Hello PIN. The login for online services, such as ZEUS, DIAS, Intranet, will be changed automatically within the next 15 minutes.
-
Open Windows settings
Open the "Settings" (Windows key +I).
Click on the "Accounts" category in the menu.
-
Store Microsoft account 1
To set up Windows Hello PIN, you must now link your device to your UAS Microsoft account. In some cases, this step can be skipped, for example, devices managed by the university IT department are often linked automatically.
Select the "Email and accounts" field on the right-hand side.
-
Deposit Microsoft account 2
If you already see an account here that ends with your business or university email address (e.g. @fh-dortmund.de or @stud.fh-dortmund.de), you do not need to do anything else and can proceed directly to the next step of the instructions.
Otherwise, add your FH account as follows:
Under the "Accounts used by other apps" section, select "Add business or school account".
Follow the on-screen instructions to enter your Microsoft account credentials.
-
Call up login options
Now go to "Accounts" again.
Click on "Login options" on the right-hand side.
-
Add Windows Hello PIN
You will find the various Windows Hello options under the section Options for logging in.
Select the "Windows Hello PIN" option and click on "Set up".
-
Enter Microsoft account password
You will be asked to enter your FH-Microsoft password and confirm this with "OK".
-
Create desired PIN
Now enter at least one six-digit PIN and confirm this with "OK".
Important: Remember this PIN well! In future, you will be asked for it instead of your FH password when you log in to your device and online services.
Tip: In addition to numbers, the PIN can also consist of letters and special characters, provided you have selected the "Include letters and symbols" checkbox.
-
Link Windows Hello PIN with business account
Click on "OK".
-
Further information required
Your organisation requires further information to protect your account.
Click on "Next".
-
Enter password
Enter your Microsoft password (not PIN!) and confirm the action with "Log in".
-
Authenticator App installieren
You will then be asked to install an authenticator app on your smartphone/tablet. The Microsoft Authenticator App is recommended for seamless integration.
After successfully installing the app, click "Next".
The following steps relate to setting up the Microsoft Authenticator app.
Note: You can also use another authenticator app of your choice, such as Google Authenticator. In this case, select the option "I want to use a different authenticator app".
-
First steps in the Authenticator app
Open the MS Authenticator app on your smartphone or tablet.
When you first start the app, you will be guided through some basic settings:
Privacy policy: Confirm the privacy policy with "Accept". If you do not agree, you will not be able to use the app.
Usage data: Simply leave this setting deactivated (already preset) and select "Next" to continue.
"Protect your digital life": Click "Skip".
.
-
Add Microsoft account
To add your Microsoft account in the app, click on the "plus symbol +" (top right in the menu) and select "Business or school account" as the account type.
-
Allow device camera
Then click on the option "QR code scan".
Allow access to your device camera with "OK" or "Allow". The camera in your device is now activated.
-
Finalise account setup
Return to your Internet browser and click "Next" in the "Protect your account - Set up account" step.
Have your smartphone/tablet ready.
-
QR code scanning
Scan the QR code now displayed with your Authenticator app on your computer screen.
Your camera app should automatically recognise and read the code.
-
Allow notifications
After you have scanned the QR code, a request to authorise messages will appear on your smartphone or tablet. Please confirm this with "OK" or "Allow".
Your FH-Microsoft account is now successfully stored in the app.
Note: If you are already using the Authenticator app, check your app settings if necessary.
-
Test push notifications
You will now see any two-digit number on your computer screen.
At the same time, you will receive a message on your smartphone or tablet. Enter the number you see on your computer in the app on your smartphone or tablet and confirm with "Yes".
-
Installation completed!
Click on "Done" to successfully complete the registration!
You can now log in to your device with your Windows Hello PIN. The login for online services, such as ZEUS, DIAS, Intranet, will be changed automatically within the next 15 minutes.
Login with Windows Hello PIN
Registration for online services
Call up an online service of the FH Dortmund, e.g. intranet, ZEUS, DIAS or study portal, via your internet browser.
-
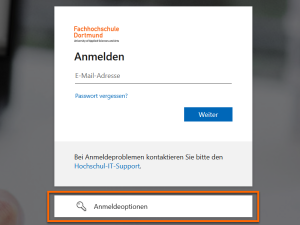
Online service registration
As soon as the UAS login screen appears, click on the "Login options" option.
-
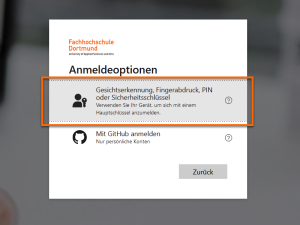
Select PIN as login option
To use Windows Hello PIN for login, click on "Face recognition, fingerprint, PIN or security key".
-
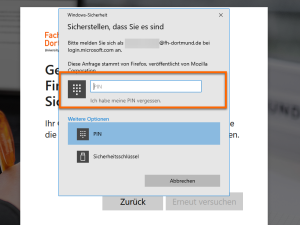
Enter PIN
A dialogue box will appear asking you to enter your Window Hello PIN.
Once you have successfully entered your PIN, you can now always log in without a password.
-
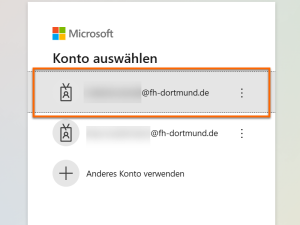
Online service registration
After you have accessed an online service of the university of applied sciences and the login screen appears, select your FH account by clicking on it.
-
Select PIN as login option
To use Windows Hello PIN for login, click on "Windows Hello or external security key".

-
Enter PIN
Es erscheint ein Dialogfenster, welches Sie auffordert Ihre Window Hello-PIN einzugeben.
Fertig.
Microsoft account login
The next time you log in, Windows no longer requires the Microsoft password, but your previously set PIN.
Frequently asked questions
Can I change my PIN?
Yes, you can easily change your PIN with Windows Hello.
Navigate to "Accounts" > "Sign-in options".
Select "PIN (Windows Hello)" and then "Change PIN".
Follow the instructions to enter your old PIN and set a new one.
I have forgotten my PIN. What can I do?
If you have forgotten your PIN for Windows Hello, you will no longer be able to log in to your Microsoft account using this method.
Local access to the device: You can still log in to your device using your Microsoft account password. This allows you to access your files and local applications.
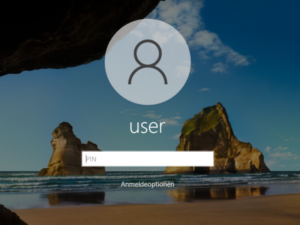
To do this, select “Sign-in options” on the start screen.
Click on the key icon. You can now use your password to sign in.
Online services: Unless you have set up an additional factor, you will not be able to sign in to your online accounts.
Here's how to remove or change the PIN:
Unmanaged devices: If it's your personal or self-managed device, you can remove the PIN via Windows Settings.
Go to “Settings” (Windows key + I).
Click on “Accounts” and select “Sign-in options”.
Under Windows Hello PIN, you will find the option to remove the PIN. To confirm the action, you must enter your password and a one-time code (OTP) from the linked authenticator app.
Once the old PIN has been removed, you can set up a new PIN using the “Add” button.
IT-managed devices: If your device is managed by FH Dortmund, you must contact the IT department by phone (+49 (0231) 9112-8888) or ticket (support@fh-dortmund.de).
What alternatives are there to Windows Hello PIN?
By setting up Windows Hello PIN, you usually already have the Microsoft Authenticator app in use, which is also suitable for multi-step login. You can find detailed instructions on how to use the app for authentication here:
University IT also offers a free USB security key as an alternative for employees and lecturers. Students can purchase such a token independently.