USB security keys, such as Yubikeys, are an additional security measure for logging in to your online accounts. They act as a second layer of protection alongside your password. When you want to log in, you must not only enter your password, but also insert the USB key into your computer or device. This confirms your identity and ensures that only you have access to your account.
Employees and teaching staff receive a free USB security key on request.
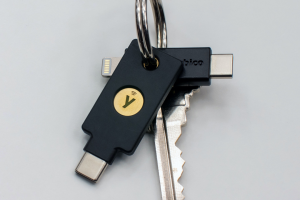
Students and external guests must purchase their own key if they are interested. The cheapest model with fewer functions is the Yubikey Security Key. USB security keys from other manufacturers are also compatible.
University IT recommends the use of USB security keys primarily for people with sound IT knowledge. This is partly because compatibility is not yet fully guaranteed for all end devices.
Alternatively, Windows Hello PIN and the Microsoft Authenticator for Android and iOS offer user-friendly solutions for multi-level authentication.
Compatibility with operating systems and browsers
Before you use a USB security key, you should definitely check its compatibility with your system. The following Infotabs show the supported operating systems and current web browsers that are in use with the Yubikey at the University of Applied Sciences. These infotabs are an inventory and are constantly updated.
Mozilla Firefox: Can be used via USB or NFC
Google Chrome: Can only be used via USB
Apple Safari: No support
Mozilla Firefox: Can only be used via USB
Google Chrome: Can only be used via USB
Apple Safari: Can only be used via USB
Mozilla Firefox: Can only be used via USB
Google Chrome: Can only be used via USB
Apple Safari: Can only be used via USB
Mozilla Firefox: No support
Google Chrome: Can only be used via USB
Apple Safari: No support
Mozilla Firefox: Can be used via USB or NFC
Google Chrome: Can be used via USB or NFC
Apple Safari: Can be used via USB or NFC
Mozilla Firefox: Can only be used via USB
Google Chrome: Can only be used via USB
Apple Safari: Can only be used via USB
In addition to operating system compatibility, some programmes such as Mozilla Thunderbird or native web apps from Microsoft Office or Teams do not fully support login with Yubikeys.
Request for a security key for employees and teaching staff
Contact the university IT department by email at support@fh-dortmund.de. Subject: Request for USB security key Yubikey.
Delivery is possible on site or by internal mail.
We will be happy to help you set up the Yubikey on request.
Setup with the USB security key (Yubikey)
If you store the Yubikey USB security key for your FH account for the first time, you will be asked for this login factor the next time you log in after 15 minutes at the latest.
The following steps are aimed at people with IT knowledge. You should understand how to configure another second factor with the Microsoft Authenticator yourself.
The following instructions describe the initial setup of a Yubikey under a FH account with an existing Microsoft Authenticator under Windows in a Chrome browser.
-
Set up Microsoft Authenticator
Before you start with the instructions, you must set up an additional login factor. Microsoft requires that an additional login factor is present when you log in with a USB security key.
You can find the necessary steps in the instructions for Microsoft Authenticator for Android and iOS. In principle, other OTP providers are also possible, such as FreeOTP or KeePassXC
-
Open web browser and log in
Open your Chrome browser, which is supported by the Yubikey.
Melden Sie sich unter folgender Adresse an:
https://mysignins.microsoft.com/security-infoNote: Mozilla Firefox is not fully supported during setup.
-
Add login method
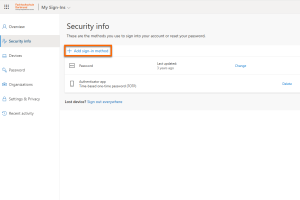
You are now in your Microsoft account in the security information.
Click Add sign-in method.
-
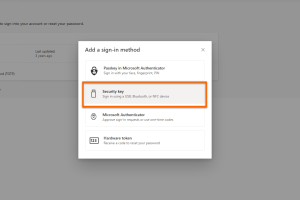
Add login method
Select Security key from the menu.
-
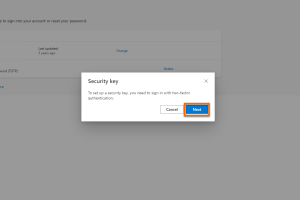
Add login method
Click on Next in the next window.
-
Add login method
In the next window, click on USB device.
If your end device supports NFC with the Yubikey, you can also select NFC device.

-
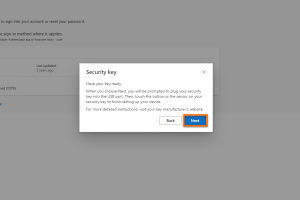
Add login method
Read the following window carefully.
Have your Yubikey ready and plug it into your end device via USB. Check beforehand whether your end device has the correct USB port.
Click on Next in the next window.
-
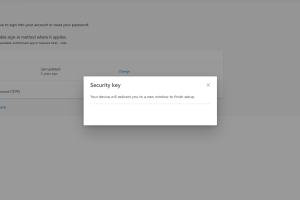
Add login method
Wait a moment until the installation of the Yubikey is complete.
-
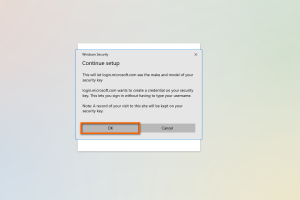
Set up Yubikey
The following window may look different depending on the operating system.
Here you can see a message under Windows that Microsoft requires metadata from Yubikey in order to be able to log in without the user name.
Confirm the window with OK.
-
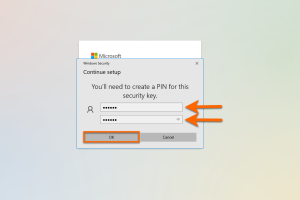
Set Yubikey PIN
In the following window, you must select a PIN for the Yubikey during the initial setup.
We recommend a PIN with a length of six to eight characters.
Repeat your PIN and confirm with OK.
Note: This window may look different depending on the operating system and web browser. Under macOS this step only works with a Chrome browser.
-
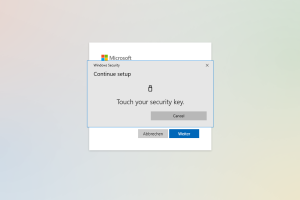
Set up Yubikey
Now tap with your finger on the golden surface of the Yubikey.
-
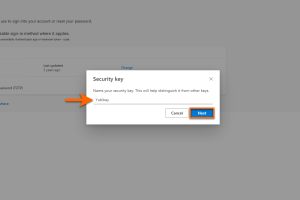
Set up Yubikey
Give your Yubikey a name so that you can distinguish it from your login factors in the security information.
Confirm your entry with Next.
-
Finalise setup
Confirm the last window with Done.
You can now use your Yubikey to log in.

If you store the Yubikey USB security key for your FH account for the first time, you will be asked for this login factor the next time you log in after 15 minutes at the latest.
The Yubikey can be used to generate the OTP function (One-Time Password). This can be used during the initial setup of the multi-factor authentication of your FH account in order to subsequently store the Yubikey as a security key. In addition to the Yubikey, you will also need the Yubico Authenticator app for Windows, macOS, Linux, Android or iOS.
University IT does not recommend the use of OTPs for the UAS services at Microsoft. The Yubikey itself uses a secure and user-friendly login method as a security key.
The following instructions describe the initial setup of a Yubikey with OTP without a private smartphone under an FH account:
-
Download Yubico Software
Download the Yubico Authenticator app and (https://www.yubico.com/products/yubico-authenticator/) install it. You will need administrative rights on your end device.
-
Open web browser and log in
Open your Chrome browser, which is supported by the Yubikey.
Melden Sie sich unter folgender Adresse an:
https://mysignins.microsoft.com/security-infoNote: Mozilla Firefox is not fully supported during setup.
-
Add sign-in method
You are now in your Microsoft account in the security information.
Click Add sign-in method.
-
Add sign-in method
Select Microsoft Authenticator from the menu.

-
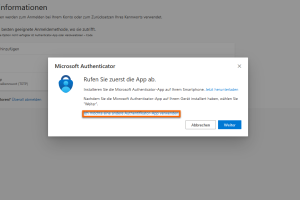
Add sign-in method
Select I want to use a different authenticator app.
-
Add sign-in method
Click on Next.
-
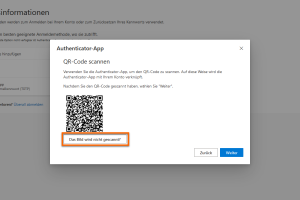
Add sign-in method
Click on The image will not be scanned.
-
Start Yubico Authenticator App
Start the already installed Yubico Authenticator app. Then connect your Yubikey to the computer.
-
Set up OTP on the Yubikey
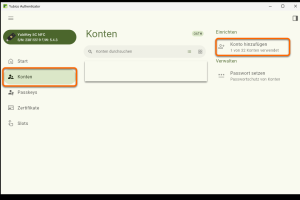
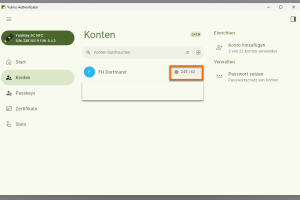
After starting the app, you have the option to add an account under Account.
-
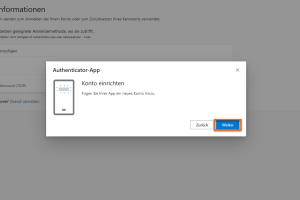
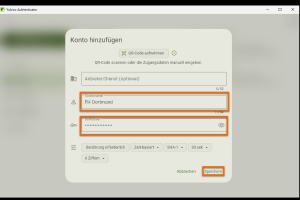
Set up OTP on the Yubikey
You have the option of entering a provider/service (optional), an account name and a secret key. For example, enter FH Dortmund as the account name. You will receive the key in the next steps.
-
Set up OTP on the Yubikey
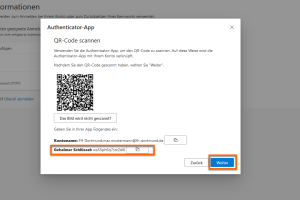
Now switch back to your web browser.
Copy the Secret key into the Key field in the Yubico Authenticator app. Click on Next.
-
Set up OTP on the Yubikey
In the Yubico Authenticator app, confirm the copied key with Save.
-
Set up OTP on the Yubikey
Copy the six displayed digits.
-
Set up OTP on the Yubikey
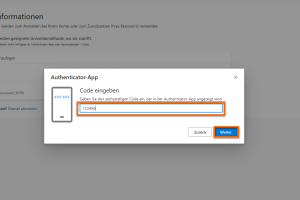
Now switch back to your web browser.
Enter the six displayed digits from the Yubico Authenticator app.
Confirm with Next.
-
Set up OTP on the Yubikey completed
You have linked an OTP created with a Yubikey to your FH account!
The Yubikey will now be linked to your Microsoft FH account.
-
Add sign-in method
Click Add sign-in method
-
Add sign-in method
Select Security key from the menu.
-
Add sign-in method
Click Next in the next window.
-
Add sign-in method
In the next window, click on USB device.
If your end device supports NFC with the Yubikey, you can also select NFC device.
-
Add sign-in method
Read the following window carefully.
Have your Yubikey ready and plug it into your end device via USB. Check beforehand whether your end device has the correct USB port.
Click Next in the next window.
-
Add sign-in method
Wait a moment until the installation of the Yubikey is complete.
-
Set up Yubikey
The following window may look different depending on the operating system.
Here you can see a message under Windows that Microsoft requires metadata from Yubikey in order to be able to log in without the user name.
Confirm the window with OK.
-
Set Yubikey PIN
In the following window, you must select a PIN for the Yubikey during the initial setup.
We recommend a PIN with a length of six to eight characters.
Repeat your PIN and confirm with OK.
Note: This window may look different depending on the operating system and web browser. Under macOS this step only works with a Chrome browser.
-
Set up Yubikey
Now tap with your finger on the golden surface of the Yubikey.
-
Set up Yubikey
Give your Yubikey a name so that you can distinguish it from your login factors in the security information.
Confirm your entry with Next.
-
Finalise setup
Confirm the last window with Done.
You can now use your Yubikey to log in.
Setup and login with the USB security key (Yubikey)
If you store the Yubikey USB security key for your FH account for the first time, you will be asked for this login factor the next time you log in after 15 minutes at the latest.
-
Open web browser
Open your web browser that is supported by the Yubikey.
Connect your Yubikey to your end device.
Log in to the intranet, for example: https://intranet.fh-dortmund.de/auth/azure/login
-
Select Sign-in options
Select Sign-in options on the login screen.

-
Select Sign-in options
Now select Face, fingerprint, PIN or security key (Firefox) or Windows Hello or external security key (Chrome).

-
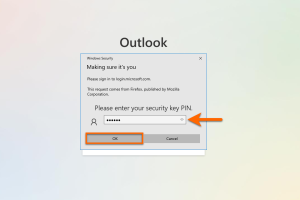
Enter PIN
Enter your PIN for the Yubikey in the new window.
Confirm with OK.
Note: This window may look different depending on the operating system and web browser.
-
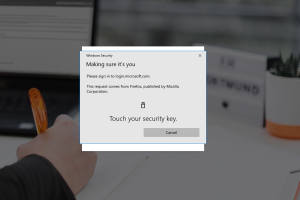
Yubikey registration
Now tap with your finger on the golden surface of the Yubikey.
You are now logged in to your FH account.
Only leave the USB security key connected to your end device for as long as you are in the vicinity of the end device! Do not leave the house key on the outside of the front door unattended.
We recommend that you always carry the USB security key on the eyelet together with your service keys.
You have eight attempts to enter the PIN correctly with the Yubikey. To prevent you from entering all eight attempts at once, you will be prompted to connect the Yubikey to your end device at intervals of 3-3-2 attempts. After the last two attempts, the Yubikey will be irrevocably reset and all login information will be deleted. To continue using the Yubikey, you must contact the IT security team.
Note: If you enter the correct PIN, the counter is reset to eight attempts.
Loss and/or defect of the security key
If you lose your USB security key or it is defective, this can block access to your online accounts.
In this case, please contact the IT department by phone (+49 (0231) 9112-8888) or ticket (support@fh-dortmund.de). If you send an email, please include the subject line "MFA reset, first and last name [ID]" so that we can process your request immediately.
For security reasons, your identity must be verified before your account can be restored.
To protect yourself from such situations, you should definitely take additional security measures. Either install the Authenticator app on several devices, use Windows Hello PIN (only for Windows operating systems) or set up an OTP provider such as FreeOTP or KeePassXC.
Extended application areas of the USB security key
A Yubikey can also be used for other programmes or technologies.
For example, the Yubikey can be used to unlock your Keepass database or a Linux LUKS hard drive encryption with an HMAC-SHA1. In addition, the Yubikey can be used to log in to a Linux computer or authenticate to servers with OpenSSH or a PGP key pair with SSH. Other functions such as OTP from Yubikey can be configured with the Yubikey Authenticator.